
Turn your own driving-school information into the beginnings of your website. Work through the setup stages at your own pace; you do not need to write everything in one sitting.
Illustrated video · 2 minutes 47 seconds · No sound
Pause or replay whenever useful. The screenshots show a fictional demonstration school, not a recording of a new setup. Use your own details, not the example names, prices or contact information.
Before you begin
DSW Core and the included website design should be installed and active. If not, start with Install DSW for the first time.
Have your school name, instructor details, contact information, lessons, prices and teaching areas ready. Optional photographs and extra information can wait.
This is not a private preview. Saving information used on existing public pages can change those pages immediately. View website opens the public website. Discouraging search engines does not make it private.
Open the setup stages
Open DSW → Getting Started, then choose Add business details. Follow the six stages. A new installation may call this area Build My Website; after setup it is called Website Pages & Menu.
Use Save and continue to save a stage and move on. If you need a break, use Save and continue later. Read any warning and correct the marked fields before leaving. Do not close a screen with unsaved work you want to keep.
1. School & Instructor
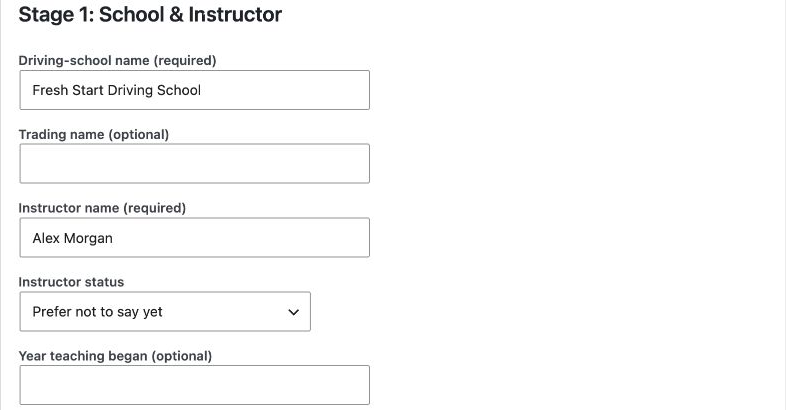
Enter your driving-school name and instructor name. Add a trading name only if you use one.
Choose the instructor status that is true for you. You can leave optional experience details blank. A newly qualified instructor does not need to invent years of experience or a grade claim.
A short welcome and a few sentences about how you teach are enough. Add your main tuition car details if ready, then save.
2. Contact
Enter the telephone, mobile, public email or WhatsApp details that pupils should use. Tick the contact methods you want to show, and select a preferred method if you wish.
Check the numbers and spelling carefully. A public email address is visible to visitors; do not use an address you want to keep private.
The website enquiry form is separate. These contact choices do not enable it. If you want a form, return to Getting Started and open Website enquiry form separately. Follow Set up and test your enquiry form.
3. Lessons & Transmission
Choose the transmission options and lessons you actually offer. For example, only select refresher or motorway lessons if you provide them. You can change these choices later in Lessons & Prices.
4. Prices
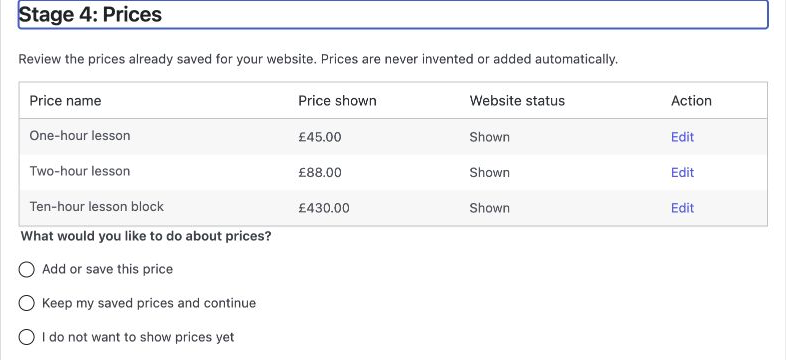
Add your own price name and amount. Check whether you want an exact price, a starting price or wording asking pupils to contact you. Select Add or save this price when adding a price, and check whether Show this price on the website is selected.
If prices are already saved and you do not want to change them, choose Keep my saved prices and continue. If you are not ready to show prices, choose I do not want to show prices yet instead. Read any message before saving.
Use Manage all prices if you need to add or review several prices. The amounts below are examples only, not suggested charges.
5. Areas & Availability
Enter your main town or service area and choose your current availability. Add a short explanation if helpful. This is information for pupils, not an online booking calendar.
For another town, village or postcode district, choose Add or save this additional area and enter its details. If you are keeping existing areas, choose Keep my saved additional areas and continue. Otherwise, select I do not need to add another area now.
6. Review & Build
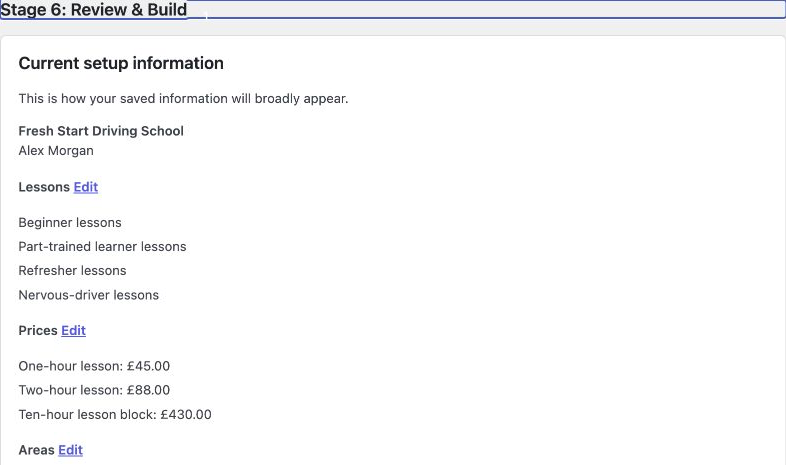
Read the saved-information summary. Use the relevant Edit link if anything is wrong.
Read Proposed website changes and check the pages and menu links. When the proposal is what you expect, select Apply these website changes, if offered. Stop and ask DSW if you see an unexpected replacement or a warning you do not understand.
If DSW says Your website pages and menu are already set up, you do not need to build them again. That message describes the current pages; it does not mean every optional page exists.
Choose your website appearance
Return to Getting Started and open Website Appearance. Choose an Overall Style, then adjust colours, fonts and the other choices if you wish. Save your changes. You can add your logo and suitable photographs when ready.
Check before sharing
Open View website and check the site as a pupil would, on a phone as well as a larger screen:
- School name, instructor information and teaching areas are correct.
- Lessons and prices are accurate.
- The menu links reach the right pages.
- Telephone, email and other contact links work.
- Your photographs and website title are appropriate.
- You have reviewed the privacy information and legal links.
If you enable the enquiry form, send a test and confirm it arrives before relying on it. The Getting Started checklist does not enable enquiries or change search settings for you.
Change business details in the relevant DSW screen. You do not need to rewrite the generated website page whenever a price or instructor detail changes.
Optional information can wait
Reviews, pupil passes, FAQs and learner resources can be added later through More Website Options. Add suitable, genuine content before trying to show its page. Do not copy the fictional demonstration reviews or passes onto your own website.
Contact DSW if you get stuck. Tell us which screen you are on and what you are trying to do. Never send passwords, payment details or pupil information.
Next: check your website before sharing it
Optional, when you are ready: add a page of your own.